lingvo
标签:lingvo目录
代码:https://github.com/tensorflow/lingvo
论文:Lingvo: a Modular and Scalable Framework for Sequence-to-Sequence Modeling
Lingvo 是一个能够为协作式深度学习研究提供完整解决方案的 Tensorflow 框架,尤其关注序列到序列模型。Lingvo 模型由模块化构件组成,这些构件灵活且易于扩展,实验配置集中且可定制。分布式训练和量化推理直接在框架内得到支持,框架内包含大量 utilities、辅助函数和最新研究思想的现有实现。
设计原则如下:
- 单个代码块应该精细且模块化,它们会使用相同的接口,同时也容易扩展;
- 实验应该是共享的、可比较的、可复现的、可理解的和正确的;
- 性能应该可以高效地扩展到生产规模的数据集,或拥有数百个加速器的分布式训练系统;
- 当模型从研究转向产品时应该尽可能共享代码。
我们可以发现好多paper都是基于lingvo跑的呢:https://github.com/tensorflow/lingvo/blob/master/PUBLICATIONS.md
api文档:https://tensorflow.github.io/lingvo/
安装及基本使用
安装
首先的首先,需要安装:
pip install tf-nightly
pip install tensorflow -U # 至少要是2.0的哦,后面会讲原因,可以自己编个whl出来,再pip本地安装
首先下载数据集(如果遇到下载的ssl问题,可以参考https://daiwk.github.io/posts/knowledge-tf-usage.html#%E5%B8%B8%E8%A7%81%E9%97%AE%E9%A2%98)
mkdir -p /tmp/mnist
bazel run -c opt //lingvo/tools:keras2ckpt -- --dataset=mnist --out=/tmp/mnist/mnist
然后build一个trainer,如果出现如下错误。。把装了tf的py扔到PATH里就行。
bazel build -c opt //lingvo:trainer
ERROR: /home/disk2/daiwenkai/workspaces/tf/lingvo/lingvo/core/ops/BUILD:24:1: no such package '@tensorflow_solib//': Traceback (most recent call last):
        File "/home/disk2/daiwenkai/workspaces/tf/lingvo/lingvo/repo.bzl", line 88
                _find_tf_lib_path(repo_ctx)
        File "/home/disk2/daiwenkai/workspaces/tf/lingvo/lingvo/repo.bzl", line 30, in _find_tf_lib_path
                fail("Could not locate tensorflow ins...")
Could not locate tensorflow installation path. and referenced by '//lingvo/core/ops:x_ops'
ERROR: Analysis of target '//lingvo:trainer' failed; build aborted: no such package '@tensorflow_solib//': Traceback (most recent call last):
        File "/home/disk2/daiwenkai/workspaces/tf/lingvo/lingvo/repo.bzl", line 88
                _find_tf_lib_path(repo_ctx)
        File "/home/disk2/daiwenkai/workspaces/tf/lingvo/lingvo/repo.bzl", line 30, in _find_tf_lib_path
                fail("Could not locate tensorflow ins...")
Could not locate tensorflow installation path.
INFO: Elapsed time: 5.916s
INFO: 0 processes.
想看详细日志,可以:
bazel build -c opt //lingvo:trainer --sandbox_debug
想把当前的PATH加进去,可以:
bazel build -c opt //lingvo:trainer --sandbox_debug --action_env=PATH
这样,就会显示:
ERROR: /home/disk2/daiwenkai/workspaces/tf/lingvo/lingvo/core/ops/BUILD:304:1: Executing genrule //lingvo/core/ops:hyps_proto_gencc failed (Exit 1) process-wrapper failed: error executing command
  (cd /home/work/.cache/bazel/_bazel_work/6019387a2835fd5f247d5cbc29b5ee5a/execroot/__main__ && \
  exec env - \
    PATH=/opt/compiler/gcc-4.8.2/bin/:/home/disk2/daiwenkai/tools/python-2.7.14/bin/:/home/disk2/daiwenkai/workspaces/tf/prepare/:/home/disk2/daiwenkai/workspaces/tf/prepare/jdk1.8.0_152/bin:/home/work/.hmpclient/bin:/home/work/.BCloud/bin:/home/work/.hmpclient/bin:/home/work/.jumbo/opt/sun-java6/bin:/home/work/.jumbo/opt/sun-java6/jre/bin:/home/work/.jumbo/opt/sun-java6/db/bin:/home/work/.jumbo/bin/core_perl:/home/work/.jumbo/bin:/usr/kerberos/bin:/usr/local/bin:/bin:/usr/bin:/usr/X11R6/bin:/opt/bin:/home/opt/bin \
    TMPDIR=/tmp \
  /home/work/.cache/bazel/_bazel_work/install/8e122cdaf21df7dee88c59e8c0fa6061/_embedded_binaries/process-wrapper '--timeout=0' '--kill_delay=15' /bin/bash -c 'source external/bazel_tools/tools/genrule/genrule-setup.sh;
          mkdir -p bazel-out/k8-opt/genfiles/lingvo/core/ops/tf_proto.$$;
          tar -C bazel-out/k8-opt/genfiles/lingvo/core/ops/tf_proto.$$ -xf bazel-out/host/genfiles/lingvo/tf_protos.tar;
          external/protobuf_protoc/bin/protoc --proto_path=bazel-out/k8-opt/genfiles/lingvo/core/ops/tf_proto.$$  --proto_path=. --cpp_out=bazel-out/k8-opt/genfiles lingvo/core/ops/hyps.proto;
          rm -rf bazel-out/k8-opt/genfiles/lingvo/core/ops/tf_proto.$$
        ')
external/protobuf_protoc/bin/protoc: /lib64/tls/libc.so.6: version `GLIBC_2.4' not found (required by external/protobuf_protoc/bin/protoc)
Target //lingvo:trainer failed to build
Use --verbose_failures to see the command lines of failed build steps.
这个时候我们会发现,,因为依赖的是用gcc4.8编译好的protoc,而下下来本地跑bazel的时候,会用本地默认的lib64,所以不行,所以我们用trick来搞,对lingvo/lingvo.bzl进行如下修改,也就是
- 一方面把
/opt/compiler/gcc-4.8.2/lib/ld-linux-x86-64.so.2 --library-path /opt/compiler/gcc-4.8.2/lib加到protoc前面, - 另一方面,手动把protc的zip下载下来,例如
lingvo/repos.bzl里要求的是3.6.1版本,然后解压到./protobuf3.6.1_dir目录,所以咱们把里面的include目录(里面有一堆.proto文件)加进来『-I/home/disk2/daiwenkai/workspaces/tf/lingvo/protobuf3.6.1_dir/include』
def _proto_gen_cc_src(name, basename):
    native.genrule(
        name = name,
        srcs = [basename + ".proto"],
        outs = [basename + ".pb.cc", basename + ".pb.h"],
        tools = [
            "@protobuf_protoc//:protoc_bin",
            "//lingvo:tf_dot_protos",
        ],
        # TODO(drpng): only unpack if tf_proto dependency is requested.
        cmd = """
          mkdir -p $(@D)/tf_proto.$$$$;
          tar -C $(@D)/tf_proto.$$$$ -xf $(location //lingvo:tf_dot_protos);
          /opt/compiler/gcc-4.8.2/lib/ld-linux-x86-64.so.2 --library-path /opt/compiler/gcc-4.8.2/lib $(location @protobuf_protoc//:protoc_bin) --proto_path=$(@D)/tf_proto.$$$$ -I/home/disk2/daiwenkai/workspaces/tf/lingvo/protobuf3.6.1_dir/include --proto_path=. --cpp_out=$(GENDIR) $(<);
          rm -rf $(@D)/tf_proto.$$$$
        """,
    )

def _proto_gen_py_src(name, basename):
    native.genrule(
        name = name,
        srcs = [basename + ".proto"],
        outs = [basename + "_pb2.py"],
        tools = [
            "@protobuf_protoc//:protoc_bin",
            "//lingvo:tf_dot_protos",
        ],
        # TODO(drpng): only unpack if tf_proto dependency is requested.
        cmd = """
          mkdir -p $(@D)/tf_proto.$$$$;
          tar -C $(@D)/tf_proto.$$$$ -xf $(location //lingvo:tf_dot_protos);
          /opt/compiler/gcc-4.8.2/lib/ld-linux-x86-64.so.2 --library-path /opt/compiler/gcc-4.8.2/lib $(location @protobuf_protoc//:protoc_bin) --proto_path=$(@D)/tf_proto.$$$$ -I/home/disk2/daiwenkai/workspaces/tf/lingvo/protobuf3.6.1_dir/include --proto_path=. --python_out=$(GENDIR) $(<);
          rm -rf $(@D)/tf_proto.$$$$
        """,
    )
注意!!!这里的protobuf版本要求是3.6.1!!!
为什么呢。。。发现我们从tf1.3源码build出来的include里会出现这种问题https://github.com/tensorflow/lingvo/issues/39,于是。。从源码编个tf2.0就行啦!!!!!
因为你的tf1.3的,那么protobuf是3.6.0的,所以是不行的呢!!
也就是说,把lingvo/repo.bzl必须是原来的3.6.1!!不要乱改成3.6.0。。。:
def lingvo_protoc_deps():
    http_archive(
        name = "protobuf_protoc",
        build_file_content = """
filegroup(
    name = "protoc_bin",
    srcs = ["bin/protoc"],
    visibility = ["//visibility:public"],
)
""",
        urls = [
            #"https://github.com/google/protobuf/releases/download/v3.6.0/protoc-3.6.0-linux-x86_64.zip",
            "https://github.com/google/protobuf/releases/download/v3.6.1/protoc-3.6.1-linux-x86_64.zip",
        ],
        sha256 = "6003de742ea3fcf703cfec1cd4a3380fd143081a2eb0e559065563496af27807",
        #sha256 = "84e29b25de6896c6c4b22067fb79472dac13cf54240a7a210ef1cac623f5231d",
    )
跑lenet5
然后就可以跑啦
bazel-bin/lingvo/trainer --run_locally=cpu --mode=sync --model=image.mnist.LeNet5 --logdir=/tmp/mnist/log --logtostderr
如果出现:『locale.Error: unsupported locale setting』这种报错!!
那么!!https://stackoverflow.com/questions/14547631/python-locale-error-unsupported-locale-setting这个解答是完美的!!
export LC_ALL=C
注意,跑的时候要装matplotlib,而且要用tk的东西(记得把libtk*,还有libtcl*拷到python的lib-dynload目录下去)~
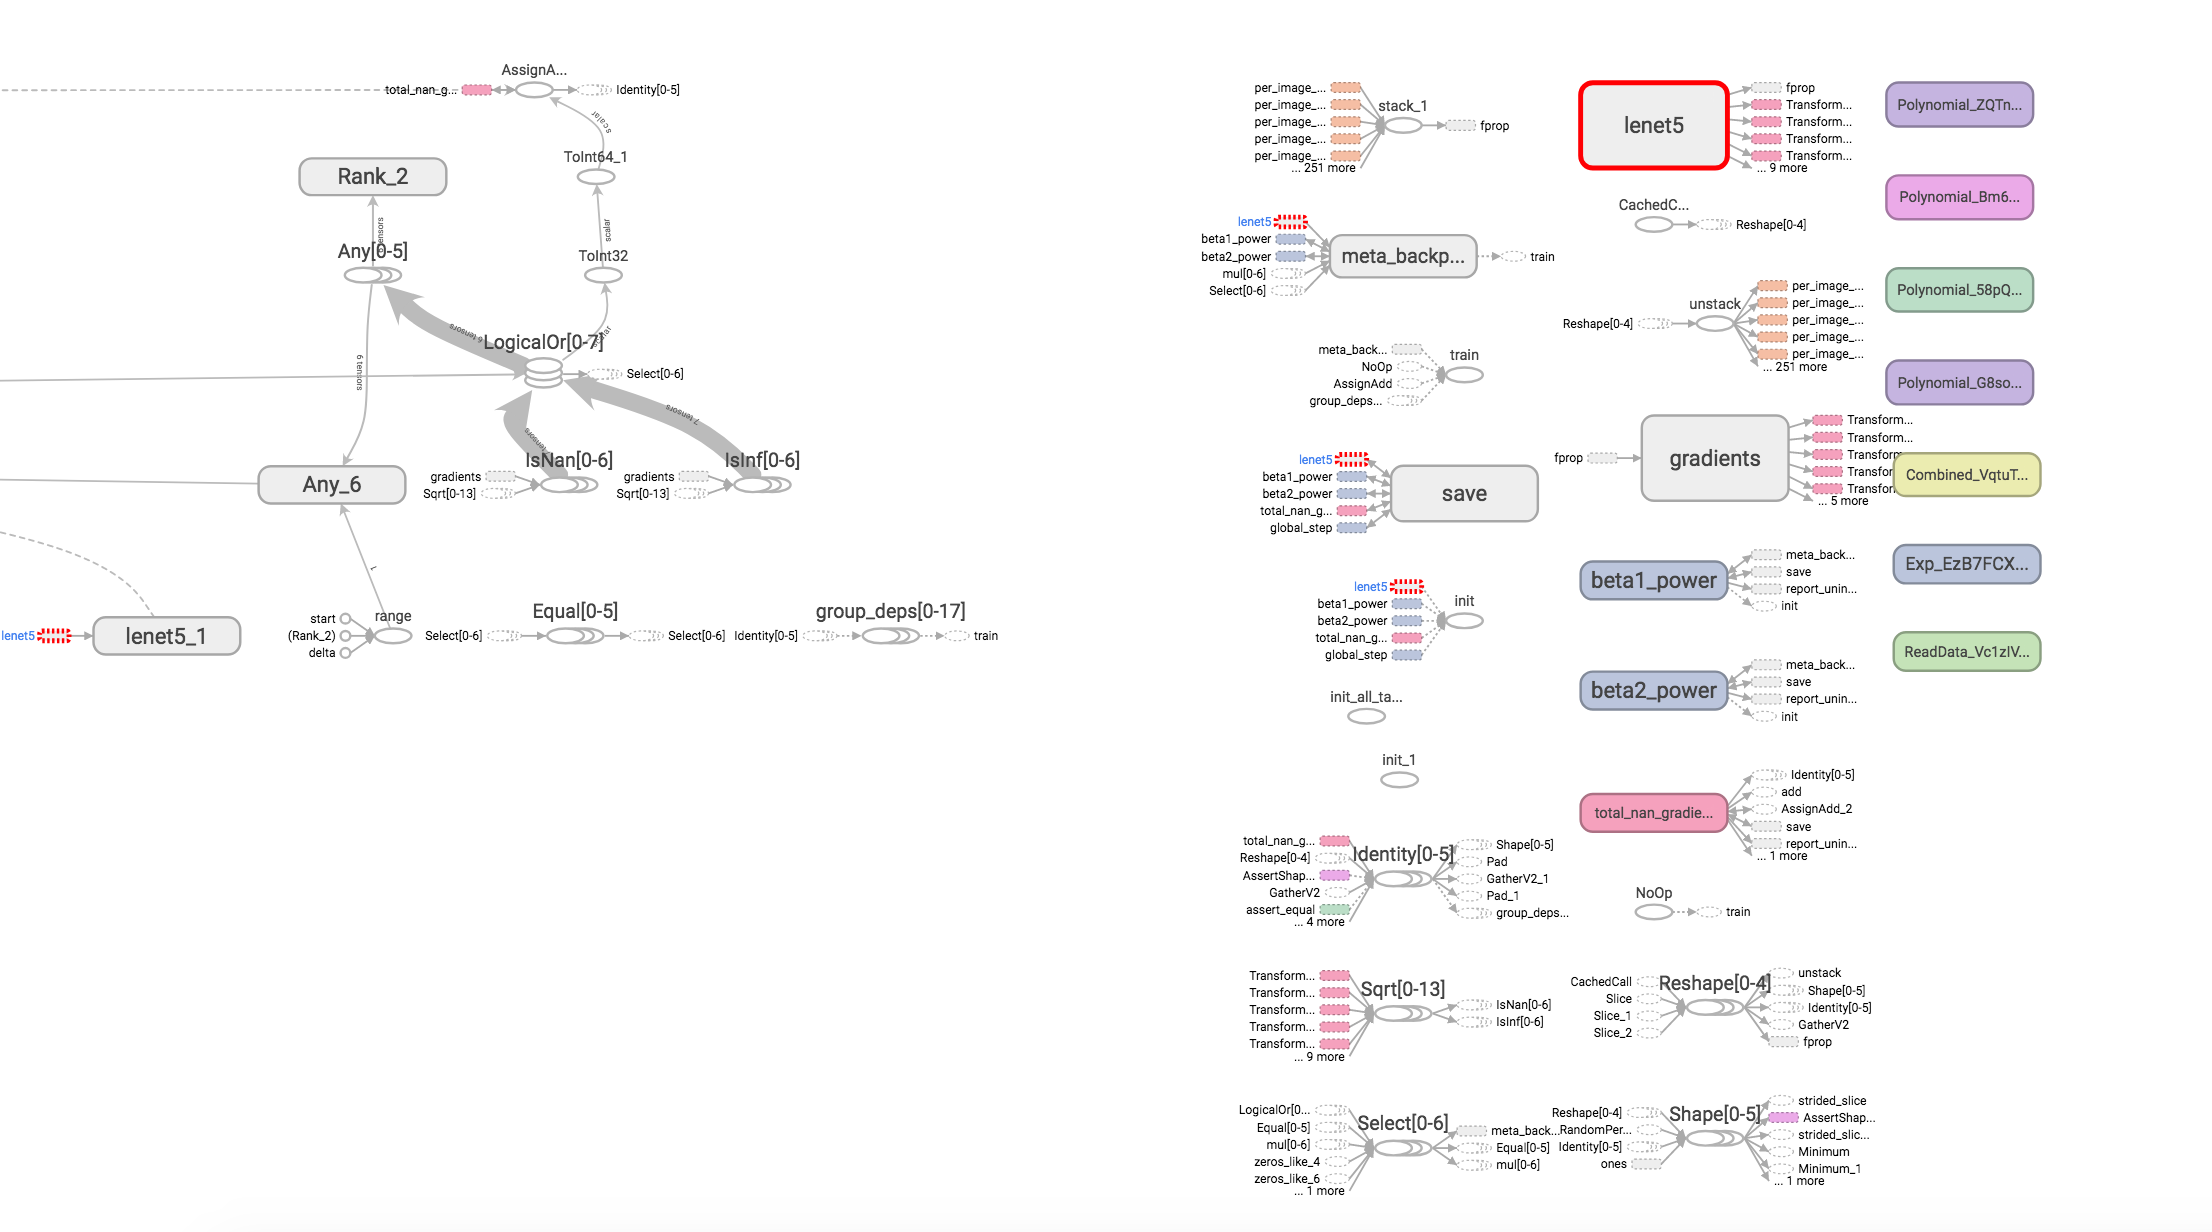
当然,我们可以看tensorboard,使用
tensorboard --logdir=/tmp/mnist/log/ --port 8023
如果提示
E0309 04:14:00.829349 139808152127232 program.py:232] Tensorboard could not bind to unsupported address family ::
ERROR: Tensorboard could not bind to unsupported address family ::
那么,我们可以加上host参数:
tensorboard --logdir=/tmp/mnist/log/ --port 8023 --host bj01-aaa.bbb.bj01
可以看到:

这样,在/tmp/mnist/log/control目录下,就有:
- params.txt: hyper-parameters.
例如:
add_summary : True
allow_implicit_capture : NoneType
cls : type/lingvo.core.base_model/SingleTaskModel
cluster.add_summary : NoneType
cluster.cls : type/lingvo.core.cluster/_Cluster
cluster.controller.devices_per_split : 1
cluster.controller.gpus_per_replica : 0
cluster.controller.name : '/job:local'
cluster.controller.num_tpu_hosts : 0
cluster.controller.replicas : 1
cluster.controller.tpus_per_replica : 0
cluster.decoder.devices_per_split : 1
cluster.decoder.gpus_per_replica : 0
cluster.decoder.name : '/job:local'

...

task.train.max_steps : 4000000
task.train.optimizer.add_summary : True
task.train.optimizer.allow_implicit_capture : NoneType
task.train.optimizer.beta1 : 0.9
task.train.optimizer.beta2 : 0.999
task.train.optimizer.cls : type/lingvo.core.optimizer/Adam
task.train.optimizer.dtype : float32
task.train.optimizer.epsilon : 1e-06
task.train.optimizer.fprop_dtype : NoneType
task.train.optimizer.inference_driver_name : NoneType
task.train.optimizer.is_eval : NoneType
task.train.optimizer.is_inference : NoneType
task.train.optimizer.name : 'Adam'
task.train.optimizer.params_init.method : 'xavier'
- model_analysis.txt: model sizes for each layer.
例如:
_task.conv[0].w           (5, 5, 1, 20)               500 lenet5/conv0/w/var
_task.conv[1].w           (5, 5, 20, 50)            25000 lenet5/conv1/w/var
_task.fc.b                (300,)                      300 lenet5/fc/b/var
_task.fc.w                (2450, 300)              735000 lenet5/fc/w/var
_task.softmax.bias_0      (10,)                        10 lenet5/softmax/bias_0/var
_task.softmax.weight_0    (300, 10)                  3000 lenet5/softmax/weight_0/var
====================================================================================================
total #params:     763810
- train.pbtxt: the training tf.GraphDef.
例如:
node {
  name: "global_step/Initializer/zeros"
  op: "Const"
  attr {
    key: "_class"
    value {
      list {
        s: "loc:@global_step"
      }
    }
  }
  attr {
    key: "dtype"
    value {
      type: DT_INT64
    }
  }
  attr {
    key: "value"
    value {
      tensor {
        dtype: DT_INT64
        tensor_shape {
        }
        int64_val: 0
      }
    }
  }
}
node {
  name: "global_step"
...
- events.*: a tensorboard events file.
而在/tmp/mnist/log/train目录下,有
- ckpt-*: the checkpoint files.
- checkpoint: a text file containing information about the checkpoint files.
例如:
model_checkpoint_path: "/tmp/mnist/log/train/ckpt-00397115"
all_model_checkpoint_paths: "/tmp/mnist/log/train/ckpt-00391858"
all_model_checkpoint_paths: "/tmp/mnist/log/train/ckpt-00391915"
all_model_checkpoint_paths: "/tmp/mnist/log/train/ckpt-00391973"
all_model_checkpoint_paths: "/tmp/mnist/log/train/ckpt-00392030"
跑机器翻译
参考https://github.com/tensorflow/lingvo/tree/master/lingvo/tasks/mt
自定义参数和模型
自定义参数
例如,我们想基于lenet5的模型,改一下训练时间,那么需要参考https://github.com/tensorflow/lingvo/issues/40
自己写一个:
@model_registry.RegisterSingleTaskModel
class LeNet5Custom(LeNet5):
  """LeNet params for MNIST classification custom."""

  @classmethod
  def Task(cls):
    p = super(LeNet5Custom, cls).Task()
    p.train.max_steps = 100
    return p
然后跑一遍全流程:
ps aux| grep tensorboard| awk '{print $2}'| xargs kill -9
nohup tensorboard --logdir=/tmp/mnist/log/ --port 8023 --host xxx-xx-xx &

bazel build -c opt //lingvo:trainer --sandbox_debug --action_env=PATH
bazel-bin/lingvo/trainer --run_locally=cpu --mode=sync --model=image.mnist.LeNet5Custom --logdir=/tmp/mnist/log --logtostderr
现有模型
语音识别(asr, Automatic Speech Recogition)
参考Listen, Attend and Spell以及End-to-end Continuous Speech Recognition using Attention-based Recurrent NN: First Results
语言模型
参考Exploring the Limits of Language Modeling
机器翻译
- mt.wmt14_en_de.WmtEnDeTransformerBase
- mt.wmt14_en_de.WmtEnDeRNMT
- mt.wmtm16_en_de.WmtCaptionEnDeTransformer
参考ACL2018的The Best of Both Worlds: Combining Recent Advances in Neural Machine Translation
原创文章,转载请注明出处!
本文链接:http://daiwk.github.io/posts/platform-lingvo.html